
Showing posts with label Training. Show all posts
Showing posts with label Training. Show all posts
13 December 2014

Controlling nerves on race day
Controlling nerves on race day – Where your mind goes, everything follows.
At the start of a race your heart is pounding, the feel of nervous energy surrounds you and finally all those hours of training you have logged are being put to the test. Athletes live for this rush of excitement and feeling of being fully alive; recognizing this feeling and channelling it into your performance can be the difference in your race.

The best way to turn your nerves into confidence it’s by firstly recognizing what physical and emotional aspects of you are nervous. On race day nerves can get the better of you and make you feel out of control. However, by recognizing what exactly these feelings are it will becomes easier to control them. A physical response to nervousness is normally a heavy heart beat. When you feel this heavy heart come on respond to it by thinking ‘this is the adrenaline in my body telling me I’m ready to race.’ An emotional response can be thinking “I’m so nervous, I don’t know what to do I’m going to come last.” A counter response to this could be “I’m ready to race, I have spent hours training for this, I’m going to give it everything. Let’s go!”
By creating a performance focus plan for racing you will be able to keep your focus where you want it and where it will work for you. If you focus on your strengths you will be strong. The more you can focus on why you’re capable and how you’re capable your confidence will grow. During your race relax your breathing and absolutely live in the moment. Think about the exact step in front of you; don’t let your mind slip into negative thoughts. Visualize your success and success will follow.
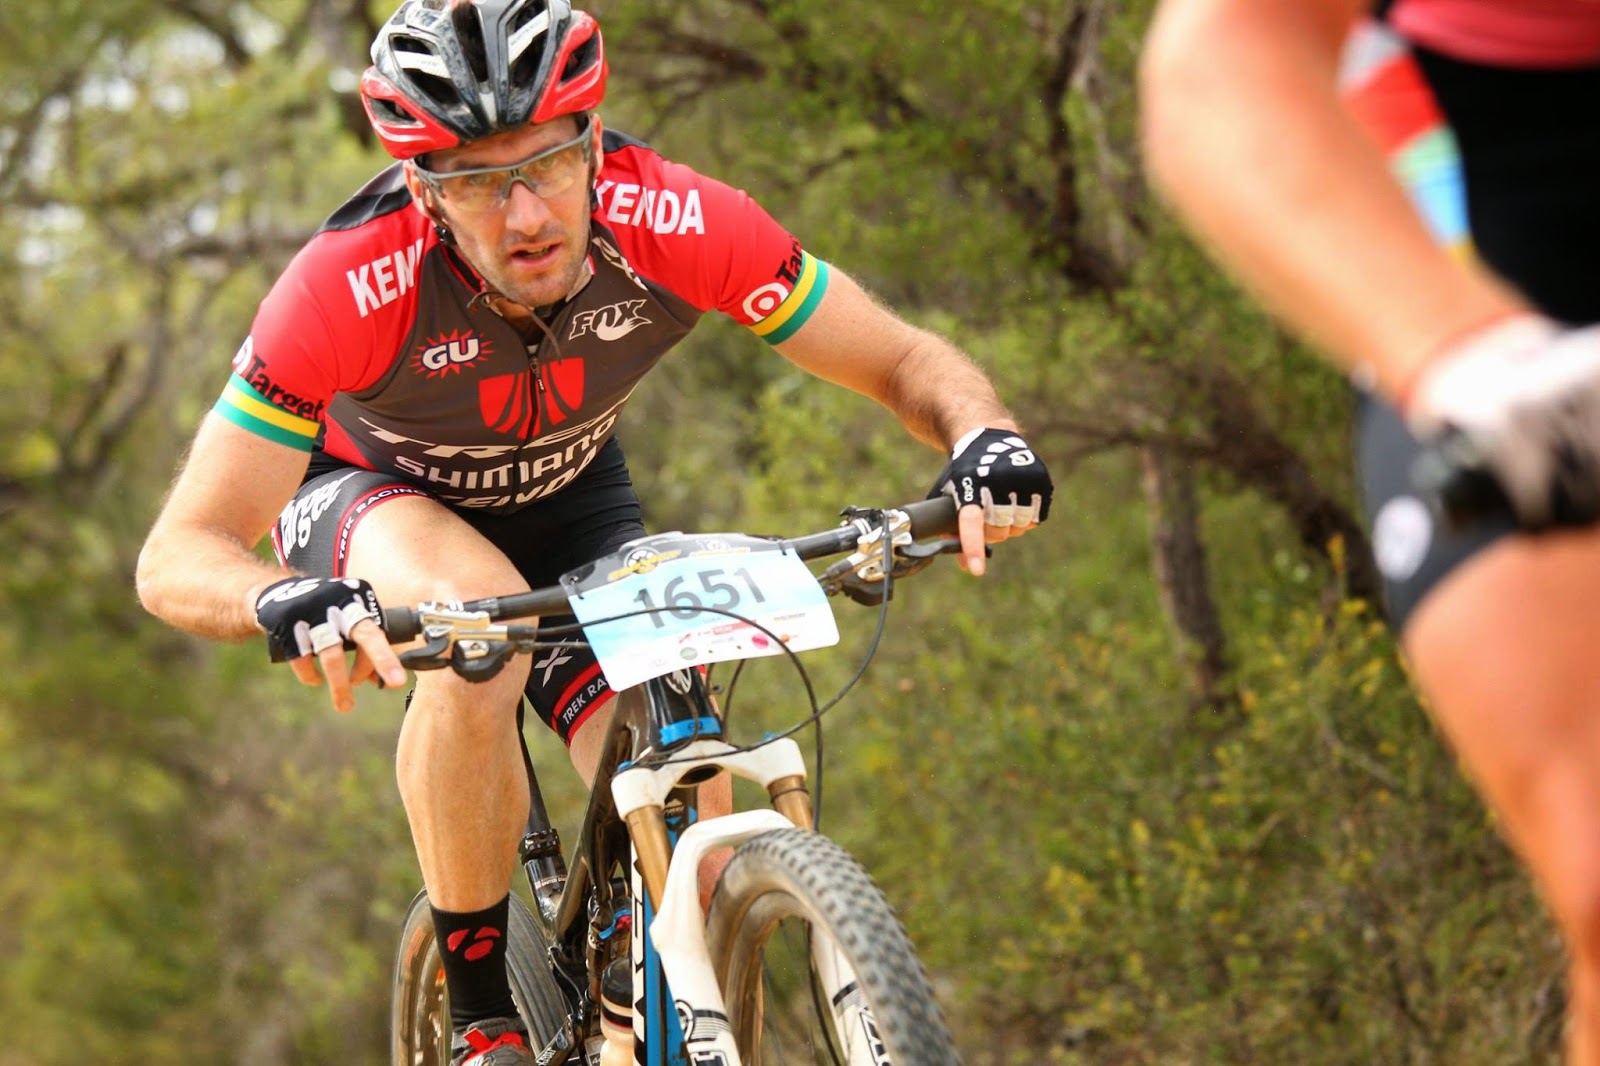 Before your next race write down what negative thoughts may come into
your head. Next to every negative thought write down a positive counter
thought. You will ALWAYS do better with a positive mind frame than a
negative one. Practice this during your training and even during your
everyday life. By doing this you will continue to improve, grow, live,
and excel in positive ways in your racing and life.
Before your next race write down what negative thoughts may come into
your head. Next to every negative thought write down a positive counter
thought. You will ALWAYS do better with a positive mind frame than a
negative one. Practice this during your training and even during your
everyday life. By doing this you will continue to improve, grow, live,
and excel in positive ways in your racing and life.
What I love about cycling and triathlon is at some point during our many hours of training we have visualised winning or having the perfect race. Sometimes that is enough, that is your moment…that is living
At the start of a race your heart is pounding, the feel of nervous energy surrounds you and finally all those hours of training you have logged are being put to the test. Athletes live for this rush of excitement and feeling of being fully alive; recognizing this feeling and channelling it into your performance can be the difference in your race.
The best way to turn your nerves into confidence it’s by firstly recognizing what physical and emotional aspects of you are nervous. On race day nerves can get the better of you and make you feel out of control. However, by recognizing what exactly these feelings are it will becomes easier to control them. A physical response to nervousness is normally a heavy heart beat. When you feel this heavy heart come on respond to it by thinking ‘this is the adrenaline in my body telling me I’m ready to race.’ An emotional response can be thinking “I’m so nervous, I don’t know what to do I’m going to come last.” A counter response to this could be “I’m ready to race, I have spent hours training for this, I’m going to give it everything. Let’s go!”
By creating a performance focus plan for racing you will be able to keep your focus where you want it and where it will work for you. If you focus on your strengths you will be strong. The more you can focus on why you’re capable and how you’re capable your confidence will grow. During your race relax your breathing and absolutely live in the moment. Think about the exact step in front of you; don’t let your mind slip into negative thoughts. Visualize your success and success will follow.
Before your next race write down what negative thoughts may come into
your head. Next to every negative thought write down a positive counter
thought. You will ALWAYS do better with a positive mind frame than a
negative one. Practice this during your training and even during your
everyday life. By doing this you will continue to improve, grow, live,
and excel in positive ways in your racing and life.What I love about cycling and triathlon is at some point during our many hours of training we have visualised winning or having the perfect race. Sometimes that is enough, that is your moment…that is living
05 June 2014
Endurance Sports Nutrition: Frequently Asked Questions
Consuming variety of carbohydrates during exercise and eating balanced training and recovery diet improve performance


Sports Nutrition News - From The American College of Sports Medicine
At the American College of Sports Medicine's 2012 annual meeting,
over 6,000 exercise scientists, sports dietitians, physicians and other
health professionals gathered to share their research.
Here are a few of the nutrition highlights:
Here are a few of the nutrition highlights:
- Bananas fuel as well as sports drinks: During a 46-mile (75-km) race, cyclists performed just as well when they fueled with banana as compared to sports drink. They drank about 8 ounces of sports drink or ate half a medium banana + water every 15 minutes during the 2.3-hour event. Time to start taping bananas to your helmet?


- Pomegranate juice helps repair muscles: Pomegranate juice is a rich source of bioactive compounds that reduce muscle soreness. Healthy men who drank PomWonderful juice for eight days before muscle-damaging exercise experienced less muscle soreness.
- Popeye was right: Nitrates in foods such as spinach (and beets) reduce the oxygen cost of exercise and enhance efficiency. Healthy young men who consumed half a liter of spinach juice for 6 days were able to perform better anaerobically. Maybe this is why Popeye was strong to the finish?
- Borscht belt: Dietary nitrates in the form of beet juice (called beetroot juice in the UK) have been shown to improve 2.5 mile (4 km) and 9.5 mile (16 km) time trial performance by almost 3% in racing cyclists. During a longer, 50-mile time trial, cyclists who consumed a half-liter of beet juice 2.5 hours pre-ride rode almost 1% faster. This small improvement was not statistically significant, but to a cyclist, the improvement would likely be meaningful. Elite rowers who consumed beet juice for 6 days performed better on an erg test. This was particularly noticeable in the later stages of exercise. Pre-exercise beets or borscht anyone?
- Reducing lactic acid: Both beta-alanine and sodium bicarbonate can reduce the negative effects of lactic acid in athletes who do very high intensity exercise. In an intense five-minute cycling test, beta-alanine enhanced performance. When combined with sodium bicarbonate, the improvements were even better.
- Pure caffeine versus coffee: Most research with caffeine is done with pure caffeine supplements. Does coffee offer the same ergogenic effect? Yes. In research with cyclists and triathletes, the time trial results were very similar with pure caffeine (39.4 minutes) and coffee (39.5 minutes). Instant decaffeinated coffee (41.4 minutes) gave the slowest time. The researchers suggest the small improvement was related to caffeine's ability to stimulate the central nervous system. This makes exercise seem easier so the athlete can work harder.
- A cup of Joe okay in the heat: An extensive review of the literature indicates caffeine does not have a dehydrating effect nor impair heat tolerance. Hence, a 150-lb (68 kg) athlete need not worry about consuming about 200 to 600 mg caffeine (3-9 mg caffeine/kg body weight) when exercising in the heat. That's 1 to 3 large cups of Joe.
- Coffee: no short- or long-term diuretic effect: While commonly consumed intakes of caffeine do not have a diuretic effect over the course of the 24-hour day, what happens in the short term? In three hours, habitual coffee drinkers who consumed 7 ounces (200 mL) coffee (with 250 mg caffeine) voided 11.3 ounces (316 mL) urine, very similar to the group that consumed plain water and voided 10.4 ounces (290 mL) urine.
- Performance-enhancing effect of coffee is in the genes: When cyclists were given 1.5 or 3 mg caffeine/lb body weight (3-6 mg/kg) one hour prior to a 24-mile (40-km) time trial, they performed equally well, regardless of the dose. However, the athletes who responded best to pre-exercise caffeine had a specific gene that was missing in the non-responders. That is, when compared according to genotypes, the AA homozygote group was 4.6% faster at 6 mg caffeine/kg as compared to 2.6% improvement in the C allele carriers. Genetic differences influence caffeine's ability to enhance exercise performance.
- Red Bull doesn't improve performance versus caffeine: Is Red Bull better than coffee? Doubtful. In a cycling time trial, Red Bull enhanced performance similarly to caffeine. Red Bull's added ingredients offered no additional benefits.
- Cross-training for better bone health: Female cyclists who trained about 10 hours a week had low spine bone density in the osteopenic range-even though they were only 26 years old! Whether you are male or female, if you spend most of your exercise-time cycling, think about cross training with weight bearing exercise to improve your bone health.
- Body fat test results skewed by exercise: When getting your body fat measured with a Bod Pod, be sure to follow the instructions to not eat, drink, or exercise for two hours before the measurement. Athletes who did 30 minutes of treadmill exercise prior to Bod Pod testing were 21.3% body fat pre-exercise and 19.6% post-exercise. That 2% drop was not due to a loss of body fat, but rather to inaccuracy related to having an elevated body-temperature!
- Body fat results vary by test: When getting your body fat measured, take note: Different methods of body fat measurement give different results. In collegiate gymnasts, the body fat results were:
- Omron HBF-510W 26.1% fat ($55 on amazon.com)
- Tanita BF-350 21.7% ($899 at Walmart)
- Tanita BF-522 21.7% ($366 at amazon.com)
- DXA 21.06% (research-based; the "gold standard")
- Calipers 19.5%
- Omron HBF-306C 18.4% ($30 on amazon.com)
- Higher sweat rates: Trained runners lost twice as much sweat during a one-hour summer race than they had predicted. As a group, they predicted losing about 750 mL sweat in hot, humid conditions but they actually lost about 1,500 ml. Weigh yourself pre/post exercise to learn your sweat rate!
02 June 2014
Andy Blair hopes Port to Port win leads to Games selection

PORT to Port mountain bike race winner Andy
Blair is hopeful he will be celebrating Glasgow Commonwealth Games
selection later this week.
Yesterday the
34-year-old from Canberra became the inaugural winner of four-day Port
to Port by an overall time of 29 seconds from Bendigo teenager Chris
Hamilton.
Blair won the 45-kilometre stage
four from Swansea to Nobby’s, which journeyed through Blacksmiths Beach
and Glenrock reserve, in a time of one hour, 44 minutes and 48 seconds.
There was a seven-man sprint to the finish line with also included the Hunter’s top cyclist, Wangi Wangi’s Chris Aitken. Aitken was fourth in stage four and finished fifth overall, 14 minutes behind Blair.
While the Port to Port is not part of the Commonwealth Games selection criteria, Blair said the victory was invaluable practice. ‘‘I don’t know if I’m going to get a call up yet, but this has formed part of my preparation,’’ Blair said.
‘‘It’s really good training, this sort of event, where you’re racing day in day out. It’s really good intensity.’’
Blair’s victory was set up on day one when won the first stage at Nelson Bay by almost three minutes from Hamilton.
On day two Hamilton beat Blair by a second in a sprint to the line. Blair’s
lead was then shaved to just 28 seconds following the third stage where
he finished seventh and 2.22 minutes behind Hamilton.
That meant it was vital Blair finished in the lead group on stage four.
‘‘It was a relief,’’ he said yesterday. ‘‘Yesterday
really ate up my margin for safety. Any little problem could have been
really bad with just a small lead of 28 seconds.’’
Blair’s partner Jenny Fay won all four stages in the women’s to be the overall series champion by almost 40 minutes.
27 May 2014
Workshop: Fixing noisy disc brakes

Although we have plenty of experience with the Elixir range, on our Whyte test bike the brakes began to develop quite a bit of audible vibration from both wheels after the first few rides. Despite the squeaky noises going on, the brakes still performed well enough, but there was also an ever-so-slight pulsing sensation through the levers that was pretty dam annoying. The issue we experienced with the brakes on the Whyte was almost exactly the same that we had with the Formula R1 brakes we tested in the previous issue. Although we had some idea of what was going on, we decided to speak to a handful of different bike shop mechanics and riders to hear their thoughts on the issue and whether they had experienced anything similar on their own bikes. On top of that, we got in touch with both SRAM and Formula to hear their thoughts on brake noise, what causes it and how best to fix it.
It has to be said firstly that there are quite a few factors that can cause a noisy disc brake, and that one persons ‘sure-fire fix’ will not necessarily address the issue that your brakes are experiencing. Here are some examples of what might be going on:
Contamination: Commonly caused by a wayward squirt of chain lube or an accidental grab of the rotor with greasy hands, contamination of your brakes will result in noise of varying levels and deterioration of overall braking power. In most cases, once the pads and rotors are contaminated, you’ll likely have to throw them into the bin and start afresh. A clear indication of contamination is if your front and rear brakes are providing different levels of stopping force (i.e. the one with less force is contaminated). However, it is possible for both to be contaminated at the one time.
Glazed Pads: Caused by excessive heat from sustained downhill braking, glazing involves your brake pads heating up to a point where the surface becomes shiny and smooth. This smoothness can cause a high-pitch whining noise, a lack of overall power and can also affect the rotor surface too, which will show discolouration like the pads. This is symptomatic of a setup that is under-gunned for your weight and/or riding style.
Poor Bed-In: If your new brakes are not correctly ‘bedded-in’ from the start, they can cause noise, poor power and a ‘shuddering’ sensation at the levers. Bedding-in brakes involves applying a consistent layer of pad material to the rotor surface. It is the interaction between this layer and the brake pads themselves that provides you with the friction that slows you down.
Improper Application: Having experienced our fair share of bike shop time during previous lives, we have found this issue is a particularly common complaint amongst riders who are using their MTB for commuting or for lighter duties on bike paths and rail trails. Disc brakes are designed to operate in some pretty full-on conditions, and their principle design is to work on friction. Sometimes that friction results in noise and there’s not a lot you can do about it. However, the lighter you are, and/or the more ‘gentile’ your riding is, the less you will be working your disc brakes to their full potential and the more chance there is for noise to occur.
After some discussion with Dylan Coulson at SRAM’s technical service centre, DSD, it appeared that our brakes were experiencing the 3rd issue, caused by improper bed-in. The vibration and shuddering we were experiencing was due to an inconsistent braking surface on the rotor, caused by dragging of the brakes during their first few outings. These microscopic ‘ripples’ along the brake rotor are magnified during hard braking, resulting in a bloody awful noise and vibration at the levers.

The steps that we will take you through today are part of a process that essentially ‘resets’ the rotor and pad surface so that you can begin bedding-in the pads as if the brakes were new again. What needs to be said here is that depending on how badly the brakes have been bedded-in in the first place, you may actually have to replace both the rotors and pads, which is what both Avid and Formula recommend. We would also recommend this if you’re guilty of a short temper or are not renowned for amazing mechanical abilities amongst your mates. Of course, if your brakes are contaminated, this process has limited effectiveness depending on how bad the contamination is. Unless you are 100% sure on the issue you’re experiencing, this may be the point where your local qualified bicycle mechanic will be better equipped to fix the issue and get you back out on the trails. We shouldn’t need to note how important brakes are whilst riding off road, but if you’re not sure – hand your steed over to the experts!
In order to carry out this procedure, you’ll need some bicycle/automotive disc brake cleaner, some clean lint-free rags, gloves, Wet ‘n’ Dry sandpaper, and the necessary Torx/Hex keys to remove your rotors and pads. A clean work surface is essential, along with ventilation.

Step 1. Remove the Disc Rotors from the wheels.

Step 2. Remove the brake pads.

Step 3. Clean both brake rotors by blasting with disc brake cleaner

Step 4. Using a small wooden block, wrap around the sandpaper so that
you have a flat surface to work with.

Step 5. Begin rubbing the brake track of the rotor with the sandpaper, making
a circular pattern and applying a medium-firm pressure. You should be able
to see a visible change in the surface (below). After sanding, give the rotor
surface a blast with disc brake cleaner to ensure all contaminants are removed.

Note the difference in the rotor surface on the left (after) and the right (before).

Step 6. Now to clean the pads. Blast the brake pads with disc brake cleaner,
then rub the pad surface along a clean rag to remove any contaminants off the surface.

Step 7. Using a clean piece of sandpaper, rub each pad in a circular motion
in order to remove any microscopic patterns on the surface. After this step,
give each pad another blast with disc brake cleaner, wipe along a clean rag
and allow to dry.

Step 8. Mount the rotors back onto the hubs and fit the pads back into the brake callipers. Ensure all hardware and mounting bolts are torqued and tight.
Step 9. Bedding In.
Depending on the brake manufacturer, this process can vary from brand to brand. If you speak to mechanics, there will likely be a range of techniques to accomplish this task properly, but the fundamental thing to remember is that you want to apply an even and smooth layer of brake pad material to the rotor surface. Here is a fairly standard step-by-step procedure that you can carry out with your freshly reset brake rotors/pads. This process is also the same if you have brand new brakes.
- Find yourself a long stretch of road, and better yet a nice long downhill road.
- Ride up to a moderate speed of around 20km/h
- Apply both brakes firmly till you are at a walking pace, but DO NOT COME TO A STOP
- Continue riding up to speed and repeat steps (2) and (3) approximately 20 times
- Continue riding, but this time at a quicker pace of around 30km/h
- Apply both brakes firmly till you are at a walking pace, but DO NOT COME TO A STOP
- Continue riding up to speed and repeat steps (5) and (6) approximately 10 times
- Do not overcook the brakes in the bed-in process (by going too fast), otherwise you’ll simply glaze the pads.
- Do not ‘drag’ the brakes or be overly gentle about it, as that is another way to develop an overly smooth pad surface that will create noise.
- Avoid trying to bed-in brakes on your very first ride off-road.
- If the noise or vibration begins to return during the bed-in process, then unfortunately your brake rotors & pads will likely need replacing, though you can attempt the entire rotor/pad reset process again if you have the patience.
For the most part, we’ve found the above process to be very effective. You should note that if you bed-in brakes properly from day one, you should have quiet, smooth and strong braking with minimal issues. Reseting the pad/rotor surface should only be necessary if you haven’t managed the bed-in process correctly.
For the full details on the process that SRAM recommends, check it out here: Avid Brake Bed-in Theory-3. And for Formula brakes, head on to their website here.
17 May 2014
Stability Exercises for Cyclists
The following stability exercises for cyclists have been specifically chosen to address the typical muscle imbalances developed by cyclists. The biking position causes certain structures to be elongated, while others are kept in a contracted position. When a muscle is stretched out for prolonged periods of time, (such as gluteus maximus in cycling) it will become long and inefficient in portions of its range. Other muscles, kept in a contracted position will become shortened and overactive. This sort of imbalance found between different muscles or even portions of one muscle, can lead to injury and inefficiency.
Naturally, the muscles used to move the bike forward will be dominant. Without a stable base to work from, these muscles cannot work effectively. The exercises found below will help improve the function of the stability muscles, as well as ensuring that they can work efficiently throughout their range.
1. Neutral Bridge with Single Leg Raise

GOALS OF EXERCISE: To optimize inner range control of gluteus maximus and improve stability function of oblique abdominal muscles.
1. Lie on a firm surface with hands on front of hips to monitor hip position.
2. Lift pelvis using both legs, then raise one leg as shown.
3. Hold this position for 10 seconds, before returning to the start position.
4. Be sure that the pelvis is held level. This is the key. One side may be more difficult to do than the other.
5. Repeat 10 times on each side with a break between every lift.
RELEVANCE TO CYCLISTS: Cyclists tend to have extremely dominant hamstring muscle activity and poor stability function in the gluts. While riding, the gluts do produce power from the middle and outer portions of their range, but fail to stabilize adequately in the inner range, largely due to the mechanical disadvantage placed upon them in the seated, lean forward position. This muscle imbalance can lead to hamstring pulls, hip problems and even IT band friction syndrome at the knee.
2. Clam Shell Exercise


GOALS OF EXERCISE: To strengthen the posterior portion of gluteus medius and gluteus maximus.
1. Lie on side, with hips at 45 degrees and knees at 90 degrees.
2. Keeping pelvis perpendicular to the floor, and heels together, raise the upper knee as high as possible, by turning out at the hip.
3. Hold for 10 seconds, repeat 10 times each side.
4. If the pelvis is not held in the correct position, the wrong muscle will be used to move the leg.
RELEVANCE TO CYCLISTS: Due to bike position and cycling motion, the rider will use the anterior portion of gluteus medius enormously, while the posterior portion will not be recruited much at all. This posterior portion is hugely important to pelvic stability and the prevention of hip, knee and back problems. It will also be needed when climbing out of the saddle.
3. Oblique Abdominal Strengthening

GOALS OF EXERCISE: To improve the stability function of the oblique abdominal musculature.
1. Lie on your back on a firm surface. Monitor position of low back with hands.
2. Raise one leg to 90 degrees, then raise the other to join it.
3. Straighten one leg, then the other, in a cycling motion while maintaining good contact between the low back and the hands.
4. Do this for 10 seconds, rest then repeat 10 times.
RELEVANCE TO CYCLISTS: When torque is applied through pedals, strong rotational forces are produced. The obliques function to decelerate these forces through the trunk and pelvis, so that the energy produced can be used to move the bike forward, rather than turning the body from side to side. When a rider gets tired, form often deteriorates and extraneous motion occurs, reducing efficiency.
4. Prone Inner Range Leg Raise


1. Lie on stomach on firm surface.
2. Bend the knee to 90 degrees.
3. Squeeze gluts on the same side, then raise the leg just 2 inches off the bed.
4. Do not allow the back to hyperextend (arch). Do not roll onto the straight leg to achieve the lift.
5. Hold for 10 seconds, repeat 10 times each side.
RELEVANCE TO CYCLIST: This exercise provides the cyclist the opportunity to work even further into the gluteus maximus inner stability range. Do not underestimate the importance of having strength in a muscle through all portions of its range. Riders who cross train into running in the off-season will need to maintain good hip stability in the upright position if they want to avoid injury.
5. Anterior Hip Stretch

GOALS OF EXERCISE: To lengthen tight tissues at the front of the hip joint.
1. Lie on the edge of a firm table or counter.
2. Pull one leg up to chest and allow the other to hang down, opening up the hip.
3. A weight may be strapped to the ankle to pull down on the leg being stretched if a more aggressive stretch is desired.
4. Hold the position for between 30 seconds and two minutes.
5. Repeat on the other side.
RELEVANCE TO CYCLISTS: Due to posture on the bike, a cyclist will inherently suffer from tight structures in the anterior hip. The following recommended stretch may not be the most convenient to do, but is the best way to make a difference.
6. Tight IT Bands?


GOALS OF EXERCISE: To release myofascial trigger points.
1. Lie over the foam roller as shown, with the top leg crossed in front or behind for support.
2. Roll back and forth to massage tight tissue, or hold pressure on especially tight trigger points to release them.
RELEVANCE TO CYCLISTS Both the bike position and pedaling motion can lead to tightness in the illiotibial band, which is found on the outside of the thigh, starting at the hip and attaching into the side of the knee. A tight IT band can lead to hip or knee problems, as well as a painful condition called IT band friction syndrome. Use of a foam roller can control some of this tightness often found in cyclists.

How to build your MTB race fuel plan
Guide to your MTB race fuel plan
Fueling is a variable that
can go haywire quickly and ruin your race. Bonking and sour stomachs
make you slow. Peak race days, those races you have invested much time,
sweat, money and many dreams into, should be the best races of your
life. A properly designed fuel plan will keep you on track to accomplish
your race goals with a happy stomach.
Here is our guide and template to put your race fuel plan together.
Use this to smoothly fuel your engine to a personal best performance in
your peak race.Race Fuel Plan Template
Simply answer the following questions to put your peak race fuel plan together:- What is your goal for this race?
- Where is the start?
- When is the start?
- Does this race have a drop bag service? What are the drop bag logistics? Where are the drop bag locations?
- How will you use the race services such as drop bags and aid stations in your fuel plan?
- During the race, where will you get your calories, electrolytes and fluids from?
- What distance is the race?
- How long (time) is this race estimated to take you?
- Where are the aid stations located?
- Which of these aid stations will you use?
- What are your estimated time splits between the aid stations you will use?
- How many calories do you need for each race split?
- How many ounces of fluid do you need for each race split?
- How many mg of electrolytes do you need for each split?
- What products will you carry on each race split to fulfill your fluid, electrolyte and calorie needs?
EXAMPLE: Race fuel plan for an 8.5 hour finish at Park City Point 2 Point
Here is a race plan example of my Park City Point 2 Point race plan. I will be self-supported, relying on race services, aid stations and drop bags. For relevance in applying the below example to yourself, my starting weight is 105 lbs. Scale your quantities accordingly.What is your goal for this race?
My goal for this race is 8:30. I will plan my race fueling around a 9 hour finish to give myself a cushion.Does this race have a drop bag service? What are the drop bag logistics? Where are the drop bag locations?
PCP2P provides a service to shuttle racer bags to the 1st (Silver Lake at Deer Valley) Support zone (mile 28) and the 2nd (Bottom of Park City Mountain Resort) support zone (mile 56). The bag/cooler must be no wider than 20″ please and SOFT SIDE AND BAGS only please. You will drop your bag(s) off at the start area before 6:30AM – – – All bags will be available for pick-up at the finish line (The Canyons).How will you use the race services such as drop bags and aid stations in your fuel plan?
I will send drop bags to both locations with spare tubes and CO2 cartridges only. I will get all other supplies needed from the aid stations.During the race where will you get your calories, electrolytes and fluids from?
I will start with fluids and calories to reach the mile 28 aid station, then will pick up what I need at each aid station. I will carry electrolyte tablets from the start.What distance is the race?
78 miles with 14,000 feet of climbing and 90% single-track.How long (time) is this race estimated to take you?
My goal is 8:30. My race fuel plan will be for 9:00 to give myself a cushion.Where are the aid stations located?
Deer Valley at mile 28, Park City at mile 56 and Mid-Mountain Trail at mile 67 (minimal supplies at this aid).Which aid stations will you use?
Deer Valley at mile 28 and Park City at mile 56| The PCP2P | Mile |
| Start | 0 |
| Deer Valley | 28 |
| Park City | 56 |
| Finish | 78 |
What are your estimated time splits between aid stations you will use?
| The PCP2P | Mile | Splits |
| Start | 0 | 0 |
| Deer Valley | 28 | 3:00 |
| Park City | 56 | 3:30 |
| Finish | 78 | 2:30 |
How many calories do you need for each race split?
I will aim for 250 calories per hour.| The PCP2P | Mile | Splits | Calories |
| Start | 0 | 0 | - |
| Deer Valley | 28 | 3:00 | 750 |
| Park City | 56 | 3:30 | 875 |
| Finish | 78 | 2:30 | 625 |
How many ounces of fluid do you need for each race split?
I will aim for 15 ounces per hour early while it is cool then bump it up higher as the air temp heats up. I may pick up some extra fluids at the mile 67 aid station if needed but will not plan for it. I will drink a cup of cold Pepsi in the Park City mile 56 aid station.| The PCP2P | Mile | Splits | Calories | Fluid (oz) |
| Start | 0 | 0 | - | - |
| Deer Valley | 28 | 3:00 | 750 | 45 |
| Park City | 56 | 3:30 | 875 | 70 |
| Finish | 78 | 2:30 | 625 | 62.5 |
How many milligrams of electrolytes do you need for each split?
My goal is 300-1,000 mg electrolytes per hour depending on the air temperature. I will get most of my electrolytes from my fluid and calories and will carry extra tablets in a baggie from the start.| The PCP2P | Mile | Splits | Calories | Fluid (oz) | Electrolytes (mg) |
| Start | 0 | 0 | - | - | 3,000 (supply for entire race) |
| Deer Valley | 28 | 3:00 | 750 | 45 | - |
| Park City | 56 | 3:30 | 875 | 70 | - |
| Finish | 78 | 2:30 | 625 | 62.5 | - |
What products will you carry on each race split to fulfill your race needs?
- Start – Deer Valley: Fuel plan requires 750 calories and 45 oz fluid.
- Deer Valley – Park City: Fuel plan requires 875 calories and 70 oz fluid.
- Park City – Finish: Fuel plan requires 625 calories and 62.5 oz fluid.
Organize your race fuel plan ahead of time to give yourself the best opportunity of accomplishing your race goals. A race fuel plan will move you through aid stations quickly getting exactly what you need. Fuel your engine all the way to the end for your most powerful finish yet.
By Lynda Wallenfels
16 May 2014
Add single speeding to your training to get faster this season
Question: Seems everyone has a Single-Speed mountain bike to train on these days. Am I missing out on something?
Single speed training isn’t just for dedicated single speed racers! All mountain bike racers interested in improving their limiters in a fun and specific way can benefit from riding and training on a single speed.
In the image below, you can view a Quadrant Analysis (QA) that was generated using Power-Tap data collected from one rider on both a geared MTB (in yellow), and a single speed MTB (in red) . This QA compares the physical demands of each MTB ride. The rides were similar in intensity (about IF .8). Each point within the QA plot shows the pedal force and pedal speed (think cadence – the vertical line corresponds to a cadence of 85). QA helps to identify the neuromuscular demands of a cycling genre. What is striking in this plot is the relative differences between SS MTB and geared MTB demands in terms of force and cadence. The iso-power lines illustrate that when pedal speed (cadence) gets very low, pedal forces must be very high to maintain power.
Single speeders spend more time at higher and lower cadences than gearies. Gearies concentrate the majority of pedaling around a small preferred cadence range, whereas single speeding requires cadences in a huge range, from 20 rpm to over 130 rpm. Single speeding puts you out of your cadence comfort zone and stimulates new abilities.
The force distribution differs significantly between both riding styles. Single speeders spend more time pedaling at higher force levels at lower cadences (i.e., they do a lot of mashing and a lot of standing). It is a matter of physics – to maintain a given power output if cadence decreases pedal force must increase, and as cadence gets really low pedal force must increase a lot. To single speed successfully you have to push a lot harder while pedaling slowly! The cadence and force characteristics of single speeding are similar to structured training drills such as spin-ups or force repeats. The single speed mountain bike is a valuable training tool!
Any hard tail mountain bike can be converted into a single speed. Everybody has an old hard tail in their garage – right? Take off all the shifting stuff and put on a handful of cassette spacers, a chain tensioner and a single speed cog.
Another benefit of riding a single speed is that single-speeds are the ultimate bad weather training machines. Sloppy conditions are hell on drive trains. Train on a single-speed through mucky and wet conditions to save your bling race bike and components for race day.
Training on a single speed builds fitness in a very specific way.
Torque
Low cadence/high force pedaling time improves low cadence power abilities mimicking the goal of structured workouts such as force repeats or muscle tension sessions. Increasing leg strength on the bike is more specific to mountain bike racing than lifting weights in the gym and comes along with the added benefits of cardio and skill development.
Full body Strength
Pedaling uphill, off-road, out of the saddle with high force and low cadence is a full body effort. This type of training increases upper body and core strength in a riding specific position.
Improve Pedal Stroke
High cadence pedaling time improves pedal stroke and replicates the goal of skills workouts such as spin-ups.
Bike Handling Skill
Single speeding enhances technical skill development with a simplified focus. Single speeding requires no gear-choice, attention and there is no need to ease up on the pedals to plan a gear shift. This frees up all pedaling and thought time to conquer a technical challenge. Hammer straight into an obstacle and attack!
Increased Efficiency
Without a big ring to accelerate after momentum loss, the penalty of technical mistakes is magnified on the single speed. It teaches you to maintain speed in corners and traction while pedaling out of the saddle. You become a more efficient rider with increased skills to maximize efficiency and conserve momentum.
Line Selection
Trail momentum killers such as soft dirt, holes, bumps and rocks become bigger features to the single speeder with no big ring to power it out. The penalty of losing momentum is a strong motivator to ride the fastest line on the trail. You will learn how to keep your bike flowing along with less power. You will become a smoother rider.
Incorporate single speed training into your program as a way to improve limiters in a manner most specific to cycling. The new challenge will add variety, simplicity in bad weather, and most of all you will reap big training benefits while having a ton of fun out on the trails.
By Lynda Wallenfels Google+ coaches and consults with mountain bike racers and is the 2009 24-hour solo single speed USA National Champion. Contact her through her LW Coaching website for more information. http://lwcoaching.com
Single speed training isn’t just for dedicated single speed racers! All mountain bike racers interested in improving their limiters in a fun and specific way can benefit from riding and training on a single speed.
In the image below, you can view a Quadrant Analysis (QA) that was generated using Power-Tap data collected from one rider on both a geared MTB (in yellow), and a single speed MTB (in red) . This QA compares the physical demands of each MTB ride. The rides were similar in intensity (about IF .8). Each point within the QA plot shows the pedal force and pedal speed (think cadence – the vertical line corresponds to a cadence of 85). QA helps to identify the neuromuscular demands of a cycling genre. What is striking in this plot is the relative differences between SS MTB and geared MTB demands in terms of force and cadence. The iso-power lines illustrate that when pedal speed (cadence) gets very low, pedal forces must be very high to maintain power.
Single speeders spend more time at higher and lower cadences than gearies. Gearies concentrate the majority of pedaling around a small preferred cadence range, whereas single speeding requires cadences in a huge range, from 20 rpm to over 130 rpm. Single speeding puts you out of your cadence comfort zone and stimulates new abilities.
The force distribution differs significantly between both riding styles. Single speeders spend more time pedaling at higher force levels at lower cadences (i.e., they do a lot of mashing and a lot of standing). It is a matter of physics – to maintain a given power output if cadence decreases pedal force must increase, and as cadence gets really low pedal force must increase a lot. To single speed successfully you have to push a lot harder while pedaling slowly! The cadence and force characteristics of single speeding are similar to structured training drills such as spin-ups or force repeats. The single speed mountain bike is a valuable training tool!
Any hard tail mountain bike can be converted into a single speed. Everybody has an old hard tail in their garage – right? Take off all the shifting stuff and put on a handful of cassette spacers, a chain tensioner and a single speed cog.
Another benefit of riding a single speed is that single-speeds are the ultimate bad weather training machines. Sloppy conditions are hell on drive trains. Train on a single-speed through mucky and wet conditions to save your bling race bike and components for race day.
Training on a single speed builds fitness in a very specific way.
Torque
Low cadence/high force pedaling time improves low cadence power abilities mimicking the goal of structured workouts such as force repeats or muscle tension sessions. Increasing leg strength on the bike is more specific to mountain bike racing than lifting weights in the gym and comes along with the added benefits of cardio and skill development.
Full body Strength
Pedaling uphill, off-road, out of the saddle with high force and low cadence is a full body effort. This type of training increases upper body and core strength in a riding specific position.
Improve Pedal Stroke
High cadence pedaling time improves pedal stroke and replicates the goal of skills workouts such as spin-ups.
Bike Handling Skill
Single speeding enhances technical skill development with a simplified focus. Single speeding requires no gear-choice, attention and there is no need to ease up on the pedals to plan a gear shift. This frees up all pedaling and thought time to conquer a technical challenge. Hammer straight into an obstacle and attack!
Increased Efficiency
Without a big ring to accelerate after momentum loss, the penalty of technical mistakes is magnified on the single speed. It teaches you to maintain speed in corners and traction while pedaling out of the saddle. You become a more efficient rider with increased skills to maximize efficiency and conserve momentum.
Line Selection
Trail momentum killers such as soft dirt, holes, bumps and rocks become bigger features to the single speeder with no big ring to power it out. The penalty of losing momentum is a strong motivator to ride the fastest line on the trail. You will learn how to keep your bike flowing along with less power. You will become a smoother rider.
Incorporate single speed training into your program as a way to improve limiters in a manner most specific to cycling. The new challenge will add variety, simplicity in bad weather, and most of all you will reap big training benefits while having a ton of fun out on the trails.
By Lynda Wallenfels Google+ coaches and consults with mountain bike racers and is the 2009 24-hour solo single speed USA National Champion. Contact her through her LW Coaching website for more information. http://lwcoaching.com
Giant Odyssey 100km 2014


There are also a 15km Pioneer and 50km Shorty option for those riders a little daunted by the idea of tackling the 100km course. This is the first year I have stayed in Forrest town and I was very impressed with the accommodation (Forrest Gate: an alpaca farm B&B 4-5km from town) and the local Brewery, a great breakfast, lunch and dinner venue. In short, Forrest is a fantastic venue for riders and their families alike, with easy access to the Great Ocean Road and an easy two hour drive from Tullamarine (or one hour from Avalon airport).
The caliber of rider attending the Odyssey is always well above average, so take your A-game and leave your excuses at home. Irrespective of the category you race it will be GAME ON from start to finish. This year there was some competition with the UCI World Cup XCO in Cairns but over 1300 riders toed the start line yesterday in Forrest, full credit to Rapid Ascent.
The elite women’s field was a sea of black, white and pink with a five strong LIV-GIANT contingent set to dominate; Jo Bennett, Rebecca Locke, Naomi Williams, Terri Rhodes and Jess Douglas. The start was dark and frosty with a 0630 briefing for a 0640 start, Argghhh! Fortunately there is plenty of ‘warm up’ time in the opening kilometres but when you hit the sand be ready as the friendly peloton chat dissipates immediately and the road turns up, up, up. I was privy to the front of the elite female race to the KOM and a bit further, by then Rebecca Locke had broken away and earned herself a comfortable 2 minute lead that, by the 98km finish, she extended to 17 minutes. I rode with Jo Bennett and Naomi Williams to the top of the sledgehammer then saw them disappear over the horizon.
In a race like this it is very important to try and keep your head together for the whole 98km, easy to say retrospectively but sometimes not so easy in the heat of the moment. I did brilliantly for the first 90km and rode comfortably in fourth place but I had deluded myself into believing it was all downhill from 85km…I completely forgot that the last 8km was a very taxing single track section that required full concentration. In my head I had the closing kilometres on the road and when it wasn’t I completely freaked, despite many kind words of encouragement from the male riders around me, my race pretty much finished there. I implore the Rapid Ascent team to consider this in future.. maybe?.. or not?..Terri Rhodes caught me in the single track and tried to encourage me on but I knew Jess wouldn’t be far behind and I had nothing left in my brain to fight her off. Jess passed me in the final kilometre and I felt like a lead sinker. I am not sure if this is something that happens often to riders toward the end of a race but for me it was a first and it is not a pleasant feeling and one I will try in earnest to prevent in future. Looking forward, an experience like this is great motivation to do a few more longer climbs before Craft BIKE Trans Alp in July.
I finished in 6th, a little disappointed not to be in the top five but the pedigree of the girls on the podium made me proud to finish in the top 10 and to actually FINISH this race is an achievement to be proud of as it is truly an epic journey, the toughest mountain bike marathon event in Australia. Rebecca Locke smashed the course and finished with a convincing lead over Jo Bennett with Naomi Williams in third, Terri Rhodes fourth and Jess Douglas fifth, an awesome performance from the Liv Giant girls on a very very tough 98km course.
 Rebecca Locke 2014 female elite winner Giant Odyssey. Photo Rapid Ascent
The Otway Odyssey was the second in the Maverick Marathon Series and the rider standings can be found on the Maverick Marathon Series website. Jenny Fay and Dylan Cooper (the winning pair from Capital Punishment, the first race in the Maverick Marathon Series)
were racing in Atherton this weekend so Shaun Lewis and I enjoyed the
yellow jersey of the Maverick Series for the Giant Odyssey. Shaun placed
2nd at the Odyssey so our standings in the Maverick Series will not be challenged and we will both be wearing yellow at the Kowalski Classic in September (21/09/2014).
 Shaun Lewis wearing the yellow leader jersey for the male elite in
Maverick Marathon Series at Giant Odyssey 2014. Photo Rapid Ascent
Shaun Lewis wearing the yellow leader jersey for the male elite in
Maverick Marathon Series at Giant Odyssey 2014. Photo Rapid Ascent The male elite race saw a convincing five minute win to Chris Jongerwaard with a photo required to split second (Shaun Lewis) and third (Adrian Jackson), Sam Chancellor (forth) and James Downing (fifth) rounded out the top five. Full Giant Odyssey 2014 results can be viewed HERE
By
Bikes of the Real Insurance XCM Series

What are the leading riders racing on? That’s easier to show. It is rare to see a 26″ wheeled bike within the men’s elite top 10, although in the women’s race, Becky Mates does race on a Cube 26″ hard tail.


Getting the front end low is paramount for good bike handling either pushing into single track corners, or when climbing. Tall or short, most racers are running their stems ‘slammed’ right on the headset top cap. For more aggressive positions, stems with bigger negative drops are run. Shaun Lewis uses a similar stem to Adrian Jackson on his Rockstar Racing Giant XTC 29er.

2 x 10 setups are pretty much standard for most cross country and XCM racers – save for a few people running a single chainring setup, such as Jet Racing rider Garry Millburn. With SRAM’s new XX.1 group set, there could well be a shift to more single ring setups.

Wheels are obviously very important for a race bike. Stans Crest 29er rims are abundant, but carbon rimmed wheels are increasing. The Radical Lights Factory Racing Team run the Enve carbon rims on their Cannondale Flash 29er Ultimate team bikes. James Downing was also running the same setup for the Wollombi Wild Ride. Andy Blair uses the new SRAM Rise 60 wheels, that incorporate a carbon rim and a free hub with fast engagement. Adrian Jackson, while not running carbon, does use titanium spokes that are tied and soldered for extra stiffness.


The course at Wollombi was fast, by all accounts. Few people took risks on equipment, with most people running the tyres that they were used to running. Andy Blair used Maxxis Ikon’s, with the reinforced EXO version on his rear wheel, and the lightweight regular version up front. Similarly, Adrian Jackson ran a Schwalbe Ralph EVO front tyre, but the snake skin version on the rear.


You need to look closely to see other changes that Elite racers are making to their bikes. Most of them are about small customisations for fit, or performance. Noatbly, Adrian Jackson runs a 140mm rear brake rotor, yet has a 180mm rotor on the front. And although most bike retailers will recommend running a longer top tube on a 29er with a shorter stem – a glance around bikes and riders shows elite riders sticking to a smaller frame with a lot of post and stem.
Handlebars are typically wide, for extra leverage on a larger 29″ wheel, and greater ease of control. With elite fields rarely bigger than 30 riders, the starts don’t require narrow bars to get through heavy traffic.

15 May 2014
Perfect mountain bike fit

Tweak your ride setup from time to time, then give yourself a few rides to decide whether you like it or not. There are some things that feel wrong when you first change them, but feel right after a few rides. In the following article we’ll lay down the basic guidelines of bike fit, together with variations to consider and the reasoning behind them. Don’t think of a bike fit and setup as something that’s carved in stone. Use our guidelines as a starting point, then go out and experiment.
Sitting comfortably?
This images below show the key areas that should be adjusted for you to achieve optimum bike fit. The first image shows the incorrect position, while the second image shows how the bike components should be positioned. Good bike position results in relaxed shoulders and slightly bent elbows


- Arms: Good bike position results in relaxed shoulders and slightly bent elbows.
- Saddle: Correct saddle position is essential for balance, control and pedaling efficiency.
- Knees: Having very slightly bent knees at the bottom of each pedal stroke is perfect.
- Frame: Getting the correct frame size is essential, but it’s only a starting point for perfect bike setup.
- Shifters and brake levers: Don’t just leave them in one position. Experiment with setting them further in on the bars or tilting them.
Although everyone is different – some folks may have longer legs but a
shorter torso, while others may have long arms but short legs – starting
with the correct-sized frame allows you to further tune the position
using stem, bar, seatpost and saddle tweaks.

Frame sizing
Manufacturers’ listed frame sizes can be confusing. One of the key considerations is the top tube length. Have a read of our specific mountain bike frame size article for our advice on getting your frame size right.
What really matters is how the bike feels when you sit on it and ride. The first thing you need to do, in the shop or on a demo ride, is set the saddle at the right height.
Saddle height
 A rough approximation of saddle height for efficient pedalling is your
trouser leg measurement plus 5in from the centre top of the saddle to
the centre top of the pedal. To work it out more accurately, with
comfort and efficiency in mind, sit squarely on your saddle with the
cranks in a straight up/straight down position. The saddle is at the
right height when your heel just touches the top of the lower pedal with
your leg straight; your crank should be right at the bottom of its
stroke. If you have to tilt to one side on the saddle to achieve this
position then the saddle is too high. Place your foot on the pedal in
the ready-to-pedal position. If your leg was straight with your heel on
the pedal it should be slightly bent at the knee in a pedalling
position. You should never feel as if you’re being forced to rock your
hips from side to side on the saddle while pedaling. You may need to make adjustments to this position according to confidence and comfort preferences, and depending on what shoes
you wear. And keep in mind that this is all based on efficient pedaling
for cross-country trail riding. Many riders will choose to set their
saddles lower for difficult descents, hence the growing popularity of
dropper seatposts for big terrain riding.
A rough approximation of saddle height for efficient pedalling is your
trouser leg measurement plus 5in from the centre top of the saddle to
the centre top of the pedal. To work it out more accurately, with
comfort and efficiency in mind, sit squarely on your saddle with the
cranks in a straight up/straight down position. The saddle is at the
right height when your heel just touches the top of the lower pedal with
your leg straight; your crank should be right at the bottom of its
stroke. If you have to tilt to one side on the saddle to achieve this
position then the saddle is too high. Place your foot on the pedal in
the ready-to-pedal position. If your leg was straight with your heel on
the pedal it should be slightly bent at the knee in a pedalling
position. You should never feel as if you’re being forced to rock your
hips from side to side on the saddle while pedaling. You may need to make adjustments to this position according to confidence and comfort preferences, and depending on what shoes
you wear. And keep in mind that this is all based on efficient pedaling
for cross-country trail riding. Many riders will choose to set their
saddles lower for difficult descents, hence the growing popularity of
dropper seatposts for big terrain riding.Saddle position
As a rule, start with your saddle as level as possible on the top. This is an efficient cross-country position but some riders will prefer a slightly tipped back saddle for tricks, stunts and/or steep downhill work, and a few who prefer the nose of the saddle slightly tipped down for climbing or a more forward-biased ride posture. But dead flat is right for most riders.
Saddle rails have a lot of fore/aft slide adjustment, and not all seatposts are created equal. Some have set-back clamps, others have clamps in line with the top of the post. This has a bearing on the position you’re trying to achieve with your saddle. A saddle set too far back can make the bike feel back-heavy, possibly even too light at the front to achieve proper suspension fork compression. A saddle set too far forward can cramp your ride position and make you feel as though you’re putting too much body weight on the front of the bike.
In theory, if a bike has exactly the right reach for you and the fork is set up properly, you’ll probably end up with the saddle set dead centre on its rails. If you’ve got long arms for your height you may end up with the saddle set well back: short arms and you’ll be looking at inline seatposts and your saddle forward. You can use stem length and handlebar position to fine-tune the way you sit over the bike too.
We’ve ridden a lot of bikes and discovered a few unusual aspects of bike setup that can help explain why a bike feels wrong for no obvious reason. One relates to saddle position. With your saddle at ‘perfect’ height, drop a plumb line from the centre of your saddle clamp to your frame’s chainstays. With everything set up for general trail riding, the plumb line should intercept the chainstays almost exactly halfway between the bottom bracket axle centre and wheel axle centre. If it’s further back you’re probably sat too far back. Put your saddle further forward for better balance, and to get the best out of your suspension forks.
Handlebar reach
If you have access to different stem lengths and different shaped handlebars, experiment with different ride positions, adjusting your saddle accordingly. Arm, leg and torso length will vary between riders of the same height and body weight distribution can have a major bearing on setup. A rider with a big belly will demand a different bike setup to a rider with a well distributed muscle mass or a heavy head – strange but true.
 A guideline for saddle to handlebar reach is to put the tip of your
elbow on the nose of the saddle and see how far your longest finger
reaches along the stem; forearm length is generally a good indicator of
full arm and torso length. Most riders looking for a fast and efficient
trail riding posture will discover that their longest finger reaches to
almost exactly halfway between the steerer top and the handlebar centre. You can fine-tune ride feel from that point by adjusting your seat
position, stem length and height, and handlebar type. Some handlebars
have a more generous backsweep than others, and you can turn bars in the
stem to tune your hold position/wrist angle. We know riders who like
their bars straight and others who find a 25-degree backsweep their ideal
solution. Keep that elbow tip to finger tip measurement in mind when
working out whether a test bike is the right size for you.
A guideline for saddle to handlebar reach is to put the tip of your
elbow on the nose of the saddle and see how far your longest finger
reaches along the stem; forearm length is generally a good indicator of
full arm and torso length. Most riders looking for a fast and efficient
trail riding posture will discover that their longest finger reaches to
almost exactly halfway between the steerer top and the handlebar centre. You can fine-tune ride feel from that point by adjusting your seat
position, stem length and height, and handlebar type. Some handlebars
have a more generous backsweep than others, and you can turn bars in the
stem to tune your hold position/wrist angle. We know riders who like
their bars straight and others who find a 25-degree backsweep their ideal
solution. Keep that elbow tip to finger tip measurement in mind when
working out whether a test bike is the right size for you. Handlebar height
 How high you have your bars is a function of steerer height (and the
amount of adjustment washers on it), stem height and rise, and handlebar
rise. Some riders feel relaxed with their bars at roughly saddle
height, others (particularly cross-country racers) have them way below
saddle height to achieve a flat backed streamline posture on the bike. Relative beginners might feel at ease with the bars set higher than
the saddle. Bear in mind that you need enough body heft tipped towards
the front of the bike to compress your suspension fork when you’re
riding rough terrain. This becomes harder to achieve if your saddle is
too low or your bars too high.
How high you have your bars is a function of steerer height (and the
amount of adjustment washers on it), stem height and rise, and handlebar
rise. Some riders feel relaxed with their bars at roughly saddle
height, others (particularly cross-country racers) have them way below
saddle height to achieve a flat backed streamline posture on the bike. Relative beginners might feel at ease with the bars set higher than
the saddle. Bear in mind that you need enough body heft tipped towards
the front of the bike to compress your suspension fork when you’re
riding rough terrain. This becomes harder to achieve if your saddle is
too low or your bars too high.Control positions
 Brake levers and gear shifters can be put in different positions on
the bar. On most brakes you can adjust lever reach too, and on some you
can adjust the point of contact where the brakes compress the pads. We
know riders who put up with their thumbs rubbing on their gear shifters
for years before realising that setting them half an inch further
inboard on the bars solves the problem without making them harder to
use.
Brake levers and gear shifters can be put in different positions on
the bar. On most brakes you can adjust lever reach too, and on some you
can adjust the point of contact where the brakes compress the pads. We
know riders who put up with their thumbs rubbing on their gear shifters
for years before realising that setting them half an inch further
inboard on the bars solves the problem without making them harder to
use. Bar width can be trimmed too: cutting an inch off either end of a 27in handlebar might make a difference to your ride comfort. Swiveling bars a few degrees back or forth in the stem can also make a difference. Don’t be afraid to try something different, but try it for a few rides in order to find the pros and cons of a new setup.
Material benefits
The materials that your bike’s components are made from can have some bearing on setup and comfort. Materials, and the way they’re used, have the most effect at the major contact points (with the rider and the ground). We’re talking about your tyres, your grips, your saddle and your pedals.
Tyres: Tyre compounds, as well as pressures, will affect the way a bike feels on the trail. Cleverly treaded dual compound tyres with a high tpi (threads per inch) carcass construction will generally deform more over rough terrain, and so grip better, without any increase in rolling resistance. Cheaply made tyres tend to grip less and are more prone to losing traction when under pressure, especially in wet conditions.
Grips: Dual compound handlebar grips, or grips made from soft foam, might not be as hardwearing as others but they’re far more comfy, absorbing vibration and making you feel more at ease on the bike on rough terrain.
Saddle: The right sort of surface material and the right sort of padding on a saddle is obviously going to make a huge difference to the way you feel about your bike. As a rule, you should be able to move easily on the surface of a saddle; fancy embroidered graphics aren’t always conducive to this. And don’t assume that more padding is always better. Slimline saddles with minimal padding in just the right places are often more comfy than big bouncy affairs, which will often chafe after a while.
Pedals: The efficiency of your pedal/shoe interface has an impact on how you ride. Stiff soled shoes with inset cleats fixed to clipless pedals will make you a more efficient ‘full circles’ pedaller. But read instructions carefully when it comes to cleat position because poorly positioned cleats can cause problems, especially with knees. Most riders start with their cleats set dead centre in the shoe recess, but that doesn’t feel right for everyone, and some cleats/pedals offer more free float movement than others.
Comfort and control variations

Wrong fit ailments
Aches and pains can be caused by aspects of bike setup, but also by other things, so don’t take this list as gospel; it’s a rough guide. See your doctor if something is really hurting, especially if it continues to hurt after riding and it’s not solved by the adjustments mentioned here. Be aware that a lot of your aches and pains on a bike are simply caused by insufficient muscle support. In other words, you may just need to ride more and do some core muscle training to work things out.
Here are some common ailments and their causes:
Back: Back pain during/after riding will often be related to poor core muscle support so there may not be a quick and easy setup fix. But try changing the position of your handlebars and/or your reach from the saddle to the bars. We know a lot of riders who’ve solved lower back pain simply by putting the stem up or down by half an inch, or getting a handlebar with more backsweep.
Shoulders/arms/neck: We're putting these three together because it’s often similar aspects of set-up that cause aches and pains in these areas, namely too much stress being placed on these bits of your body. This may be caused by being sat too far forward on the bike but it can also be down to sitting too far back, making you curl your shoulders and preventing you holding the bar properly. Experiment with stem height and saddle-to-bar reach. Try different bar shapes: a lot of riders find that more backsweep or upsweep on a bar will make them feel far more comfortable. Also, try anatomically shaped grips, which support your hands better.
Hips: A lot of hip problems among cyclists are caused by the saddle being either too high, too low, tipped too far back or forward or not offering the right sort of padded support.
Subscribe to:
Posts (Atom)